Golang JWT Authentication with Redis

Golang JWT Authentication with Redis
In this article, we will create a JWT-based authentication system using Golang. Our system will use the following technologies:
- Fiber: A fast web framework
- GORM: ORM for interacting with PostgreSQL
- JWT: JSON Web Token for authentication
- Redis: Cache for token management
- PostgreSQL: Database for storing user data
- Bcrypt: Secure algorithm for password hashing
These are the components we will use within the Golang project. Additionally, for external project components:
- Redis: Cache for token management
- PostgreSQL: Database for storing user data
Requirements
You will need the following tools to complete this project:
-
Go: Download the latest version from https://golang.org/dl/.
-
PostgreSQL:
- Download: https://www.postgresql.org/download/
- IDE suggestion: pgAdmin (comes with PostgreSQL) or DBeaver (https://dbeaver.io/)
After installing PostgreSQL:
- Create a new database (e.g.,
auth_system) - Note down the username, password, and database name (we will use these in the
.envfile)
-
Redis:
- Download: https://redis.io/download
- IDE suggestion: RedisInsight (https://redislabs.com/redis-enterprise/redis-insight/)
After installing Redis:
- It will run on
localhost:6379by default - You can use RedisInsight to visualize the data
-
IDE:
- GoLand (https://www.jetbrains.com/go/) or
- Visual Studio Code (https://code.visualstudio.com/) with the Go extension
-
Postman: To test your API (https://www.postman.com/)
Creating the Project
-
First, create a new directory for the project and initialize the Go module:
-
Install the necessary dependencies:
Project Structure
Our project structure will be as follows:
jwt-auth/
│
├── config/
│   └── config.go
├── database/
│   └── database.go
├── handlers/
│   └── auth.go
├── middleware/
│   └── auth.go
├── models/
│   └── user.go
├── .env
└── main.go
.env File
- Create a ‘.env’ file and fill it with the following content using your database information:
|
|
Configuration
- Create ‘config.go’ file under the ‘config’ directory:
|
|
Database Connection
- Create ‘database.go’ file under the ‘database’ directory:
|
|
Models
- Create ‘user.go’ file under the ‘models’ directory:
|
|
Handlers
- Create ‘auth.go’ file under the ‘handlers’ directory:
|
|
Middleware
- Create ‘auth.go’ file under the ‘middleware’ directory:
|
|
Main File
- Finally, create the ‘main.go’ file:
|
|
Running the Application
- Ensure that the PostgreSQL and Redis databases are running.
- After setting up your environment, you can run your application with the following command:
|
|

*Figure 1: Running the Application*
Testing the Application
- I tested our application using Postman. You can also use Postman to test your application.
Creating a User
- We will send a post request with Postman. In the address field, we write http://localhost:6000/register and in the Body section, select raw and write the following JSON. You can use any username and password.
|
|
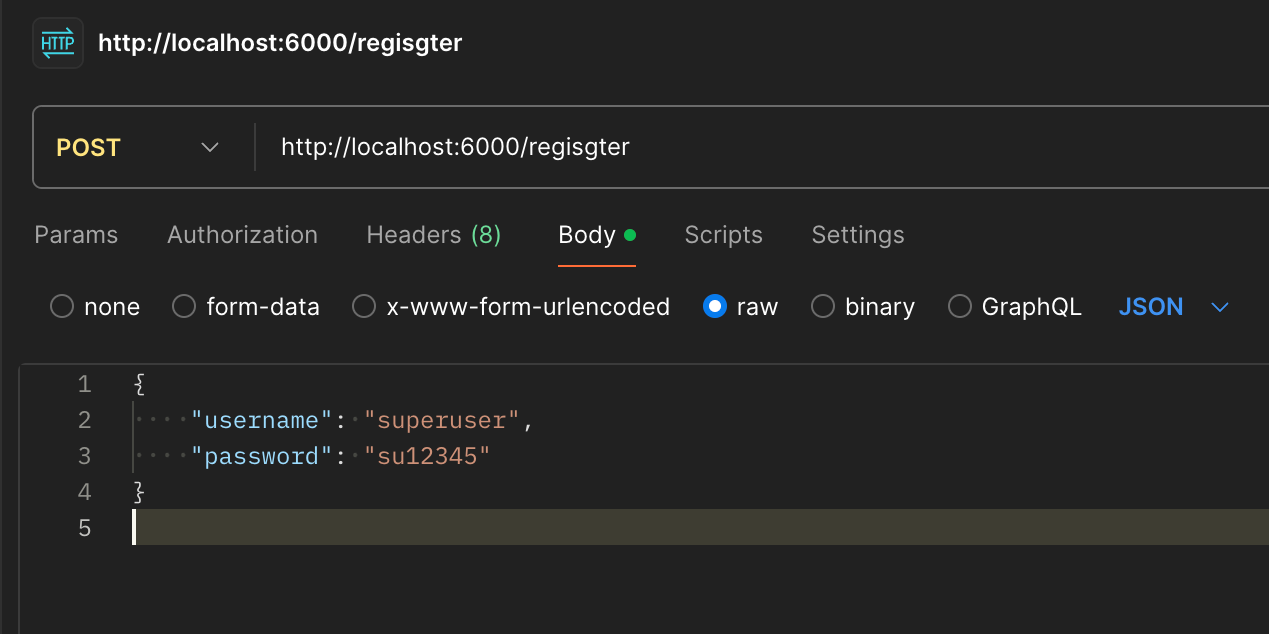
*Figure 2: Postman User Creation*
- The response to the register post sent with Postman looks like this:
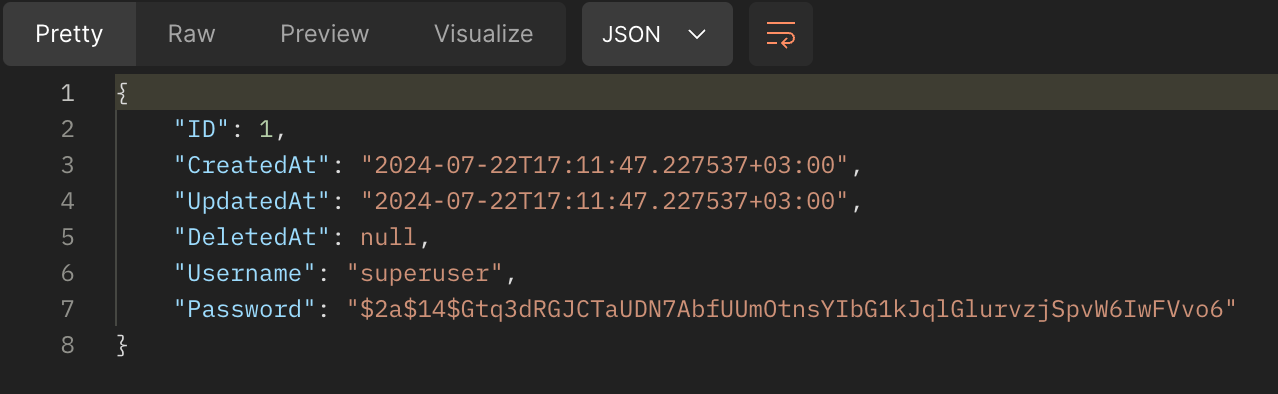
*Şekil 3: Postman Register Post Return *
- The record created in the database looks like this:

*Figure 4: Record Created in the Database*
User Login
- We will send a post request with Postman. In the address field, we write http://localhost:6000/login and in the Body section, select raw and write the created username and password.
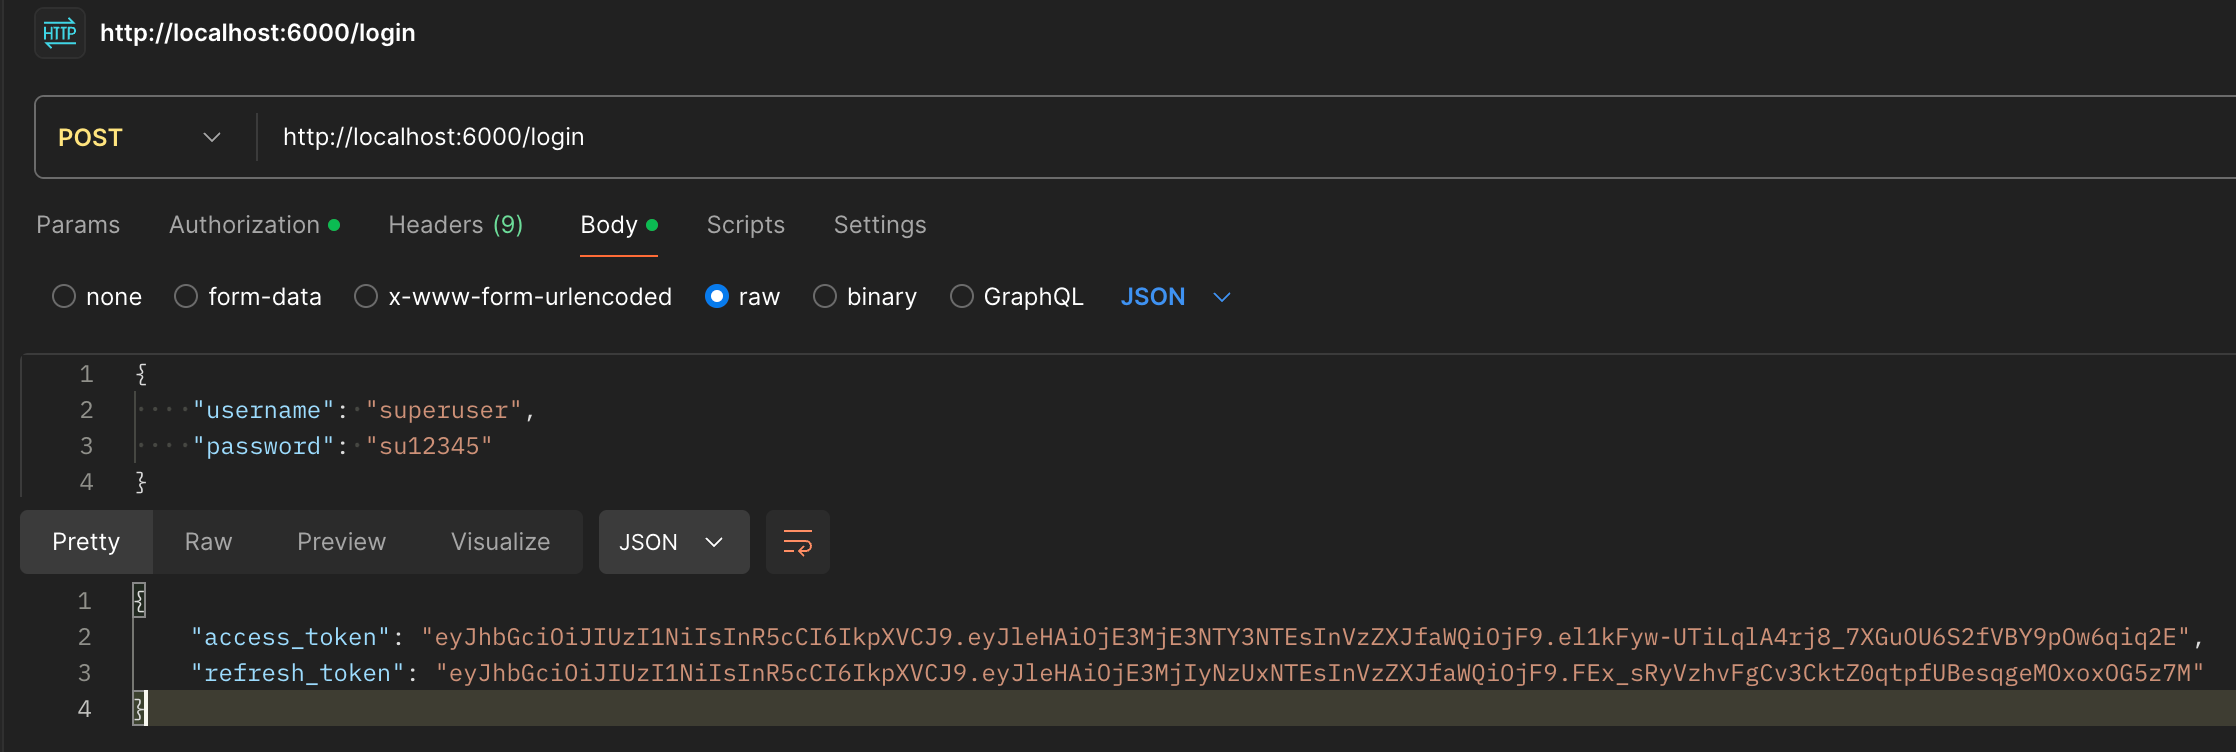
*Figure 5: User Login with Postman*
- As shown in the figure, the login process was successfully completed, and two JWT tokens, an access_token and a refresh_token, were created. These tokens are stored in our Redis database, which you can see in the image below. Note down the access_token as we will need it in the next step.
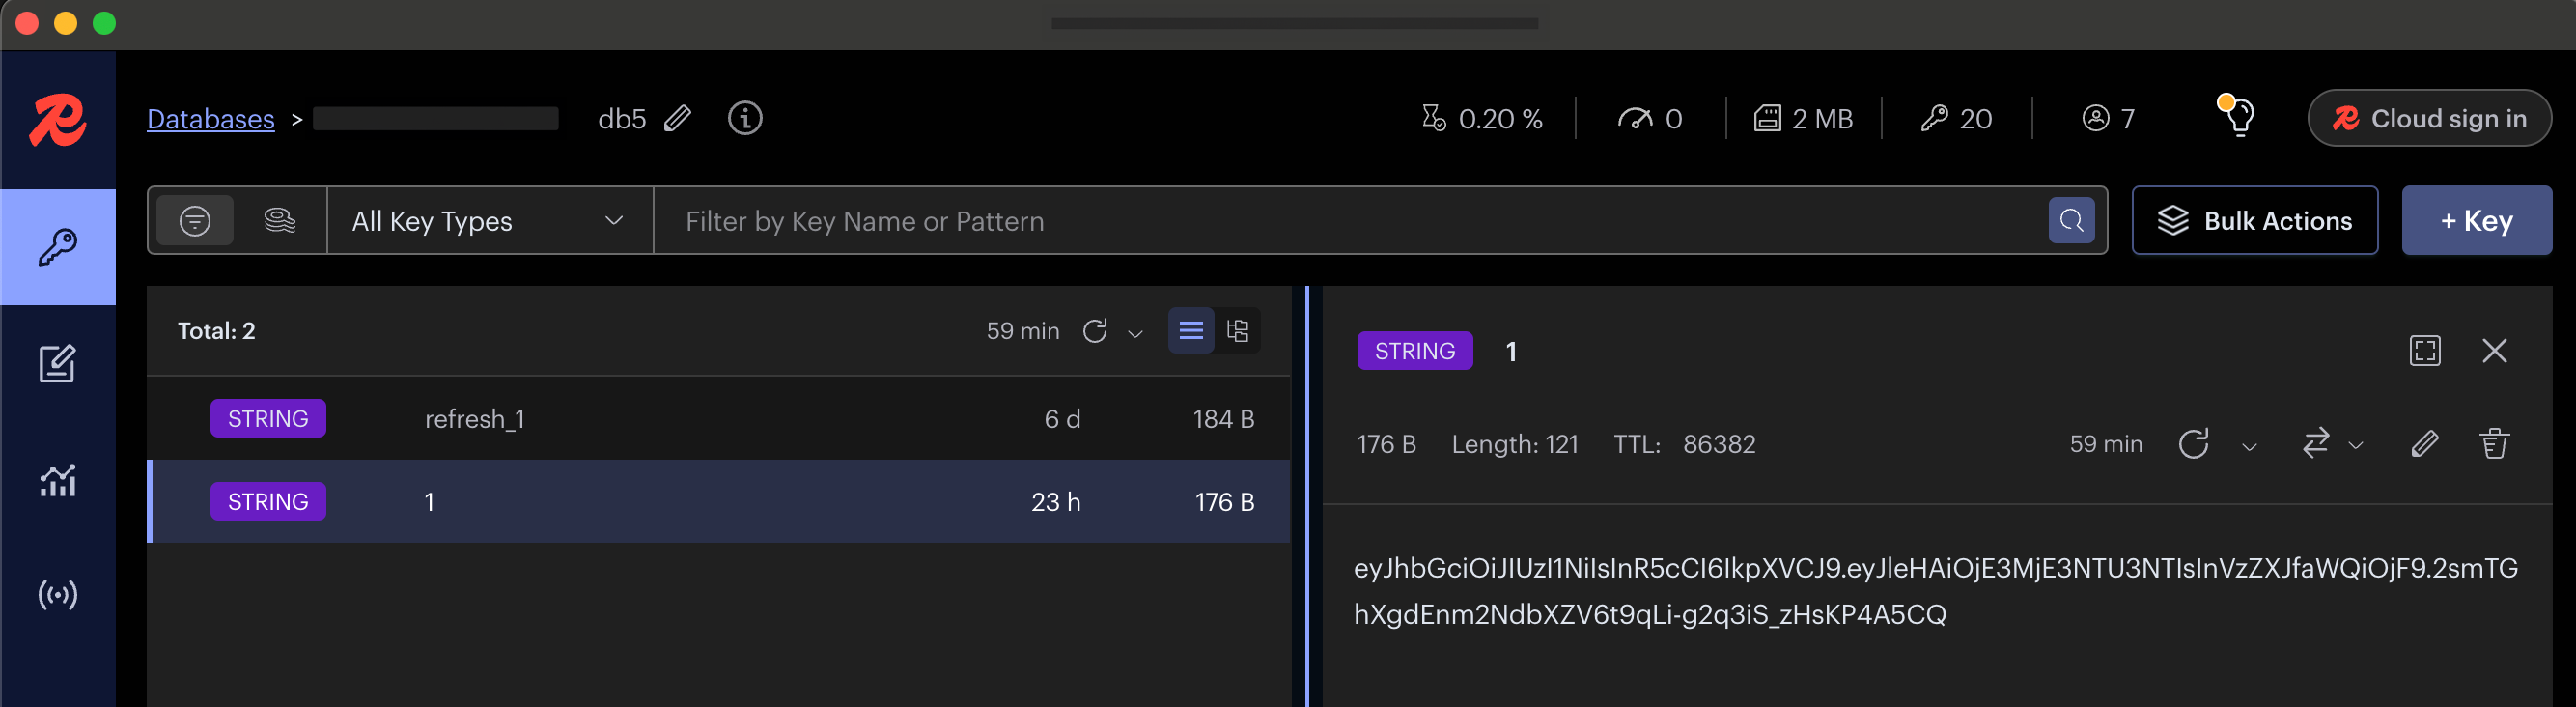
*Figure 6: Tokens Stored in Redis*
Getting User Details
- We will make a get request with Postman. In the address field, we write http://localhost:6000/user and in the Authentication section, select Auth Type as Bearer Token and write the noted access_token in the token field.
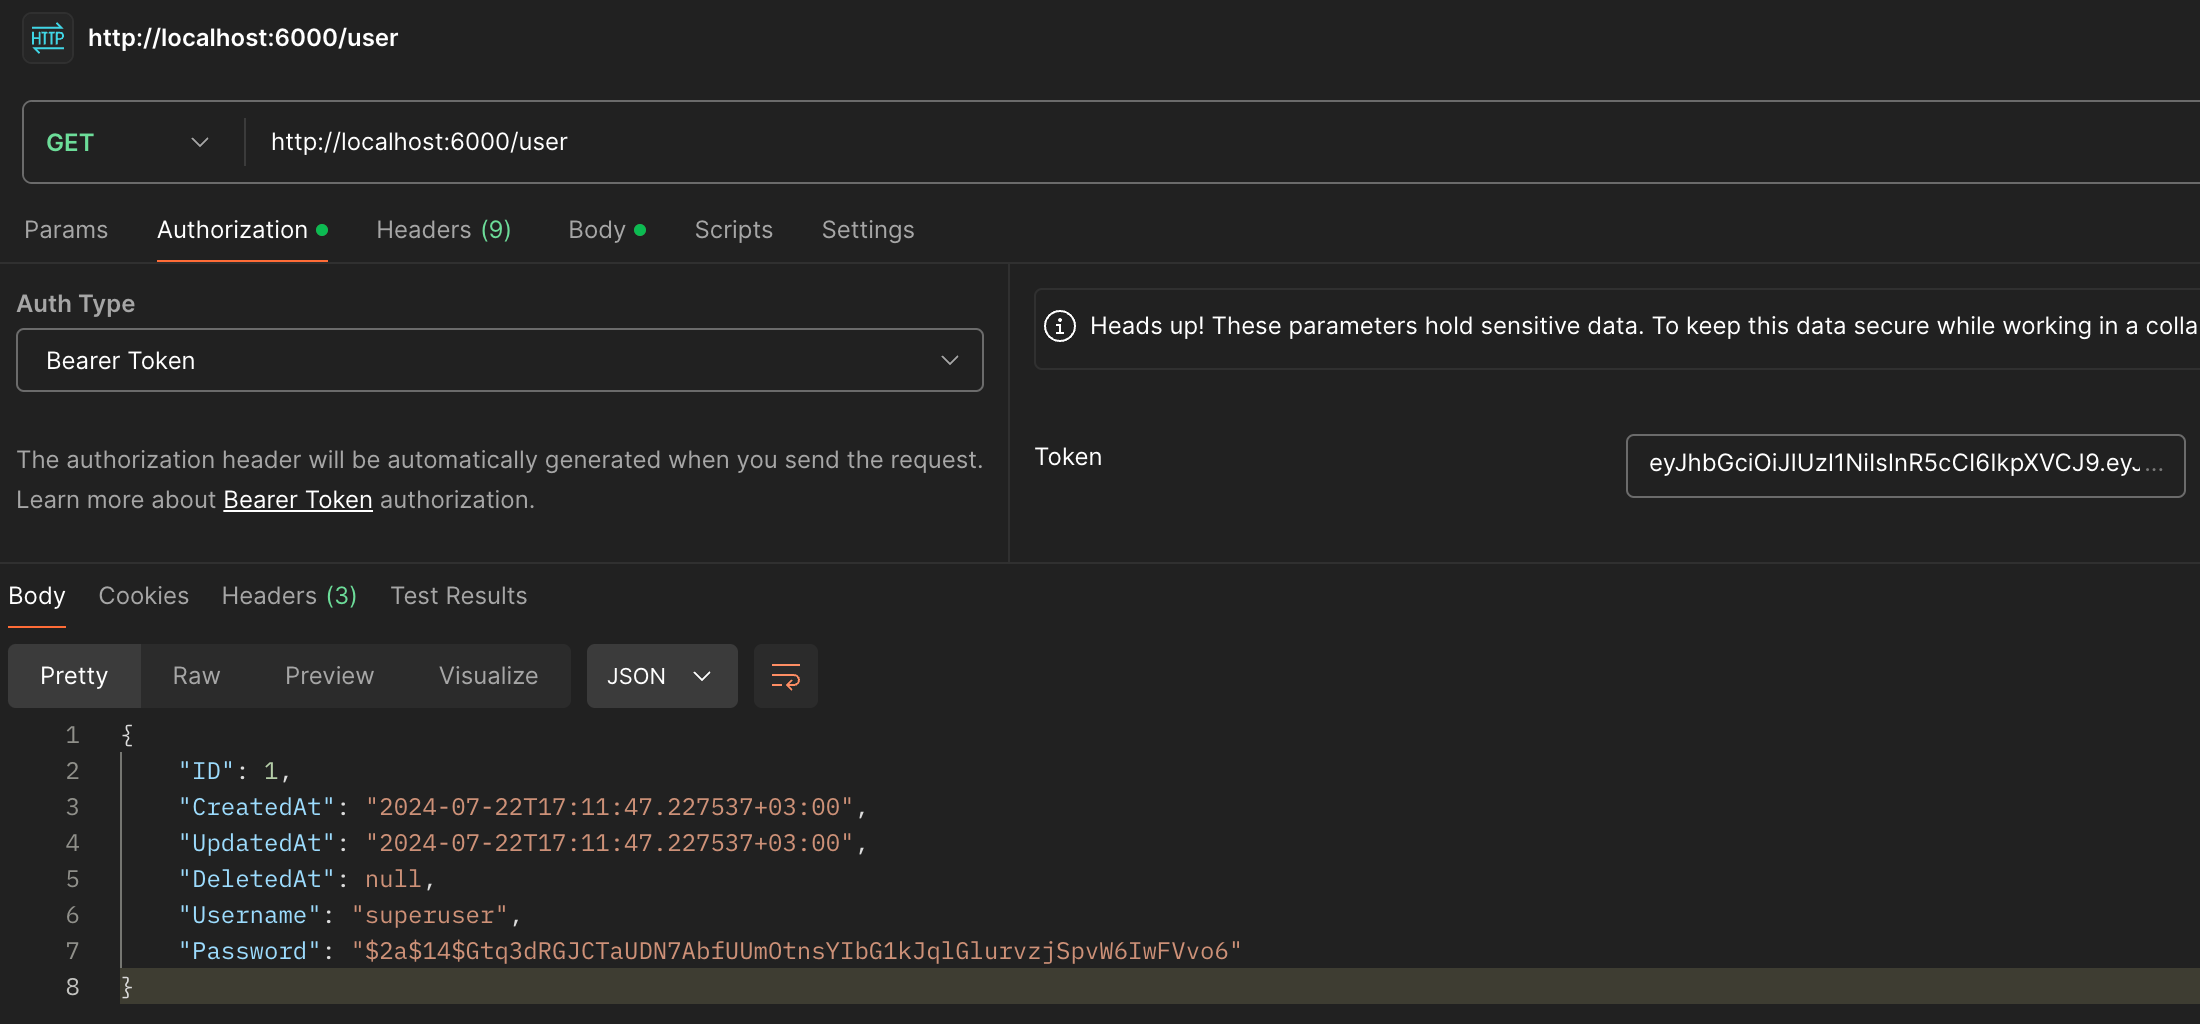
*Figure 7: User Details*
Refreshing the Token
- We will send a post request with Postman. In the address field, we write http://localhost:6000/refresh without making any other changes, and click the send button.
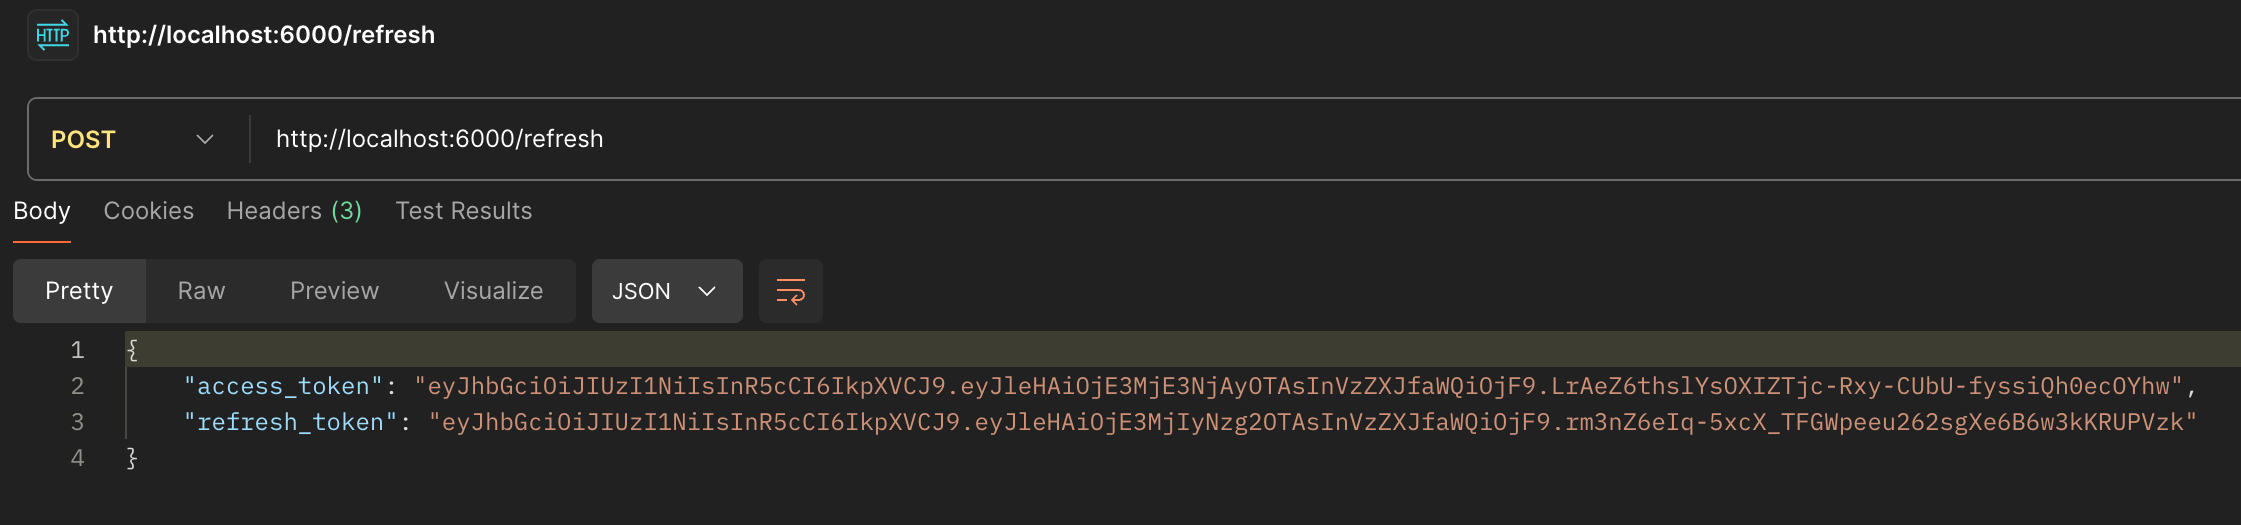
*Figure 8: Token Refresh*
Logging Out
- We will send a post request with Postman. In the address field, we write http://localhost:6000/logout without making any other changes, and click the send button.
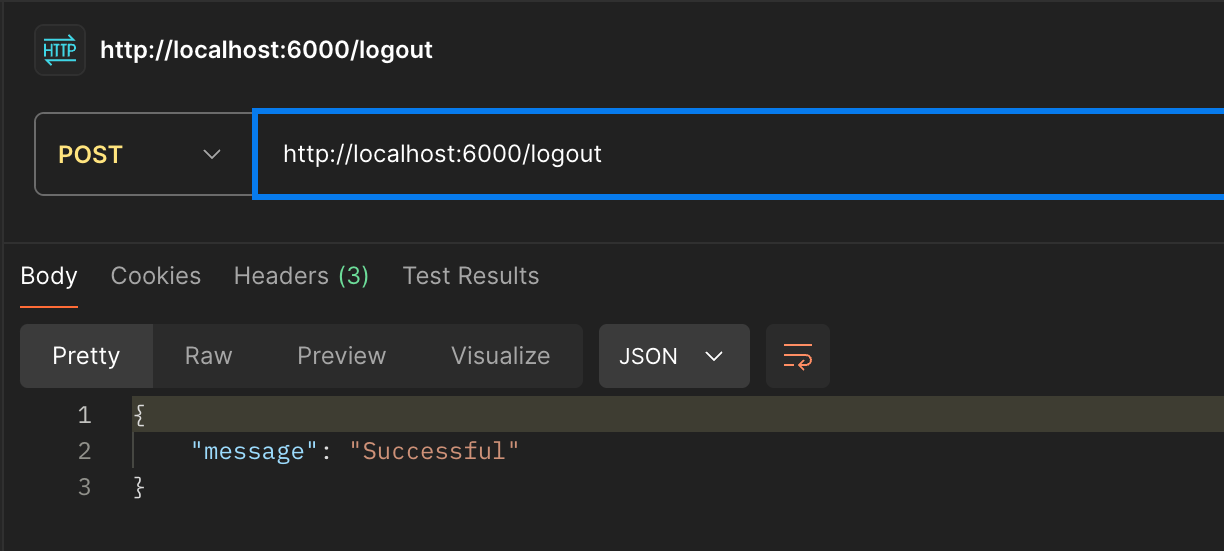
*Figure 9: Logging Out*
Conclusion
-
In this article, I tried to explain step by step how to create a JWT-based authentication system using Golang, Fiber, GORM, PostgreSQL, and Redis. You now have a basic framework that you can extend with additional features according to your needs.
-
I hope this article is helpful while developing your projects. If you have any questions or points to add, I would be happy to help!
-
In my next articles, I will also be writing and sharing the Frontend part of this project using Svelte.
-
You can find the source code for the project on the GitHub repository. Github